
3D Chess Board
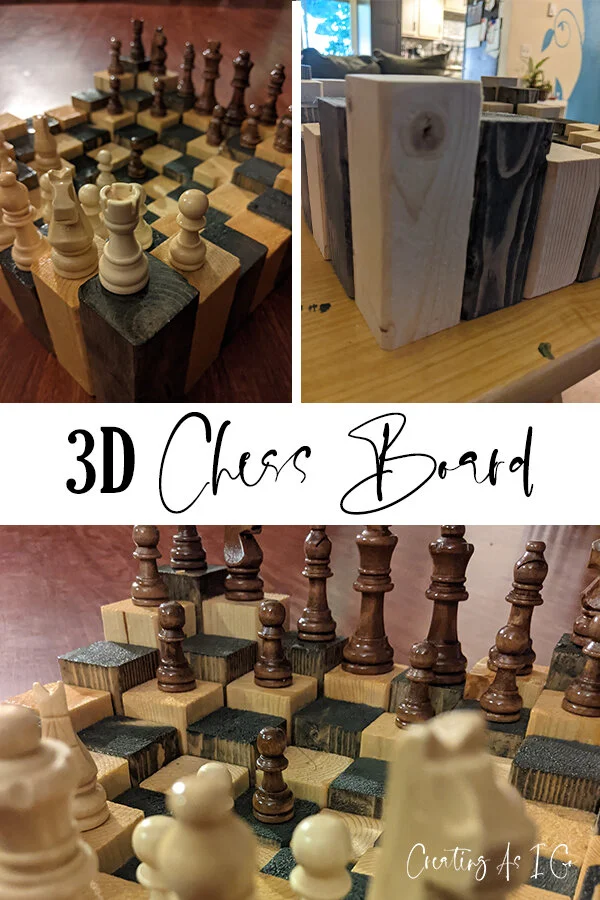
A few years ago I saw a 3D Chess board on Pinterest (where else?) and thought to myself, that looks like something I could make! Do I play chess? No. But I was curious and wanted to try to make it.
The original did not have instructions, but I thought I could figure it out on my own from their picture. I drew out the design on paper so I could figure out how much wood to buy and to decide on my different sizes of blocks. I decided to use 2x2 wood with the shortest block as 1” tall and with each step up at 1/2”, this would put my tallest block at 4”. Using 2x2s, I was looking at a board that was about 12” square.

With my trusty sketch at my side, I set to work cutting the pieces of my two 2x2 boards. This actually took about an hour to do to cut out the 32 pieces. Once I cut out one length, I used that one as my template so that I was sure they were all the same. I did not sand each end as I wanted to keep it rustic, but I did smooth out the edges by hand. In hindsight, and if I ever make another one, I will sand each end as well.
3D Chess Layout One
3D Chess Layout Two
3D Chess Layout Three
Before staining the black pieces, I wanted to lay out my board and make sure I did it correctly. I had originally planned on Layout One, but then I started to wonder if I could do others…so I came up with Layout Two and Layout Three. Although these other layouts intrigued me, I decided to stay with my original layout - primarily because I wanted to be able to flip the board over and use the other side as a flat playing area (for either chess or checkers).
After staining half of the pieces (all six sides), I assembled the board again to make sure I liked how some of the grains showed through. I then glued one row at a time and kept the pieces tight together with the clamp. Once the 8 rows were glued together, I began gluing each row to another, giving ample time for each section to dry.
I added several coats of polyurethane to all sides of the board. I was pleased to see that when the board was flipped over, the four corners held it straight and a level board was available for a game of checkers! And, fortunately, I have a friend that loves chess and he got my imperfect board! I’m glad it went to a home that will play the game!
Disclaimer: This post contains Amazon affiliate links. I am a participant in the Amazon Services LLC Associates Program, an affiliate advertising program designed to provide a means for sites to earn advertising fees by advertising and linking to Amazon.com. This means that if you choose to purchase an item from a link in this post, I will earn a small advertising fee to help pay for future creations, so thank you!